
Tuckpointing 101: The Basics
Brick homes are beautiful, classic, and structurally stout. Yet, brick structures do require upkeep in order to maintain their integrity and vibrant appearance. Tuckpointing is one of the simplest, but most effective ways to ensure the quality of brick walls and facades. What is tuckpointing? Tuckpointing is the process of removing old, deteriorated mortar from in between bricks, and replacing it with new mortar. Here, we’ll explain everything you need to know about this essential maintenance procedure and answer a few FAQs as well:

How Often is Tuckpointing Required?
The great news about tuckpointing is that, when done correctly, you won’t have to worry about replacing mortar again for decades. Typically, experts recommend that homeowners tuckpoint every 20-25 years. It’s worth noting that tuckpointing won’t last quite as long as an original application of mortar. Other factors that could influence how long mortar lasts include the climate (specifically how wet or cold an environment is), the color of the brick, and quality of the mortar application. You can tell if you need tuckpointing done by running a sharp surface along mortar joints. If that produces a fine powder, then your home could need tuckpointing. Loose bricks will also indicate that it’s time to tuckpoint.
Why Should I Tuckpoint?
Tuckpointing serves two critical purposes. First, tuckpointing when necessary will restore the structural integrity of brick facades that would otherwise deteriorate over time. Neglecting to tuckpoint could lead to structural damage and expensive repair costs. Secondly, professional tuckpointing enhances the appearance of brick walls and chimneys.
Tuckpointing DIY Tips
If so inclined, homeowners can choose to tuckpoint their own houses. To do so, you’ll need (at least) the following equipment to get started:
- An angle or tuckpoint-specific grinder
- Chisel
- Tuckpointer blade
- Hammer
- Hammer Drill
- Mortar Gun
- Trowel
- Safety Goggles
- Earplugs
- Hose
- Brush
- Mortar mix
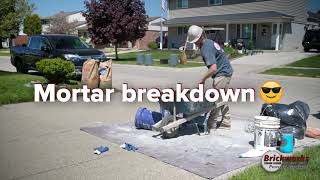
To begin, you’ll want to use the angle grinder to grind away at both the horizontal and vertical joints along the brick surface. Next, use a rotary hammer drill to remove the remaining mortar. You can also use a chisel to chip away at any left over flakes. Brush the joints down and wash them with water. From there, you can apply new mortar to the joints with a trowel and tuckpointer blade. Lastly, after waiting around a half hour, smooth out the mortar and brush away any debris. (Note that this is not a step-by-step breakdown of the tuckpointing process, but rather a quick overview.)
Benefits to Professional Tuckpointing
While it may be tempting to try and tuckpoint parts of your home by yourself, it’s often a better idea to simply contact a professional to perform this task. Tuckpointing requires special equipment and a fine attention to detail. It’s easy for untrained individuals to accidentally chip or damage bricks when removing old mortar. What’s more, an improperly tuckpointed wall will probably require more future work (and time and money) than one tuckpointed by a professional. Lastly, professionals understand how to tuckpoint facades and restore the surface to its original quality and color. Ameatuer tuckpointing jobs may appear inconsistent by comparison.
Final Thoughts
Need help tuckpointing your home? Then don’t hesitate to contact us here at 586-868-3234. At Brickworks, we strive to provide excellent service for all of your home-improvement and masonry needs. We’ll work with you to deliver a cost-effective solution that will protect both your exterior walls and the natural beauty of your brick home!

Contact Us
Contact Us Today


We're Built on a Foundation of Excellence
Check Out Our Awards & Certifications
- Angi Super Service Award 2023
- Nextdoor Neighborhood Favorite 2023
- A+ Better Business Bureau Rating
- Certified by the Environmental Protection Agency
- Certified Chimney Sweep

